UW Virtual Brain Project
The UW Virtual Brain Project is an ongoing research project designed to test the effectiveness of virtual reality-based learning. It was developed in Unity and runs on desktop platforms as well as the Oculus Rift, Quest, and Go. I was the lead developer on this project and assisted in the project’s design since it’s inception.
The project consists of a number of lessons, each of which guides the user through a single sensory system within the brain. Short videos of the Visual, Auditory, and Somatosensory systems are available below. The full experience of each system takes approximately five minutes to complete. You can see a demo of one of the lessons in the video below:
My work on the Virtual Brain Project is described in the following publication:
- The UW Virtual Brain Project: An immersive approach to teaching functional neuroanatomy (Translational Issues in Psychological Science, Volume 7, Issue 3, September 2021)
For more information about the UW Virtual Brain Project, visit its website at https://schlosslab.discovery.wisc.edu/projects/#Brain.
Platforms
The Virtual Brain is designed to run on both Oculus headsets and traditional desktop displays. For research, the Oculus Rift CV1 is used alongside a desktop system. Lessons have been ported to the Oculus Quest, Oculus Go, and Oculus Rift S headsets for display at demos and other events. In spring 2019, 25 Oculus Go headsets were used in a lecture hall so the students could experience the Visual and Auditory system lessons during class time. In spring 2021, desktop versions of lessons were distributed for students without access to VR devices.
For the second research experiment, the Looking Glass autostereoscopic display was added as a supported platform. This display was used in conjunction with the Oculus and PC experiences. The paper tests used in the first experiment were replaced by a virtual reality testing environment displayed in the Looking Glass, with controls accessed on an accompanying touchscreen display. A simplified view of the brain was displayed on the Looking Glass, and users could interact with it using their hands via a Leap Motion hand tracking system.
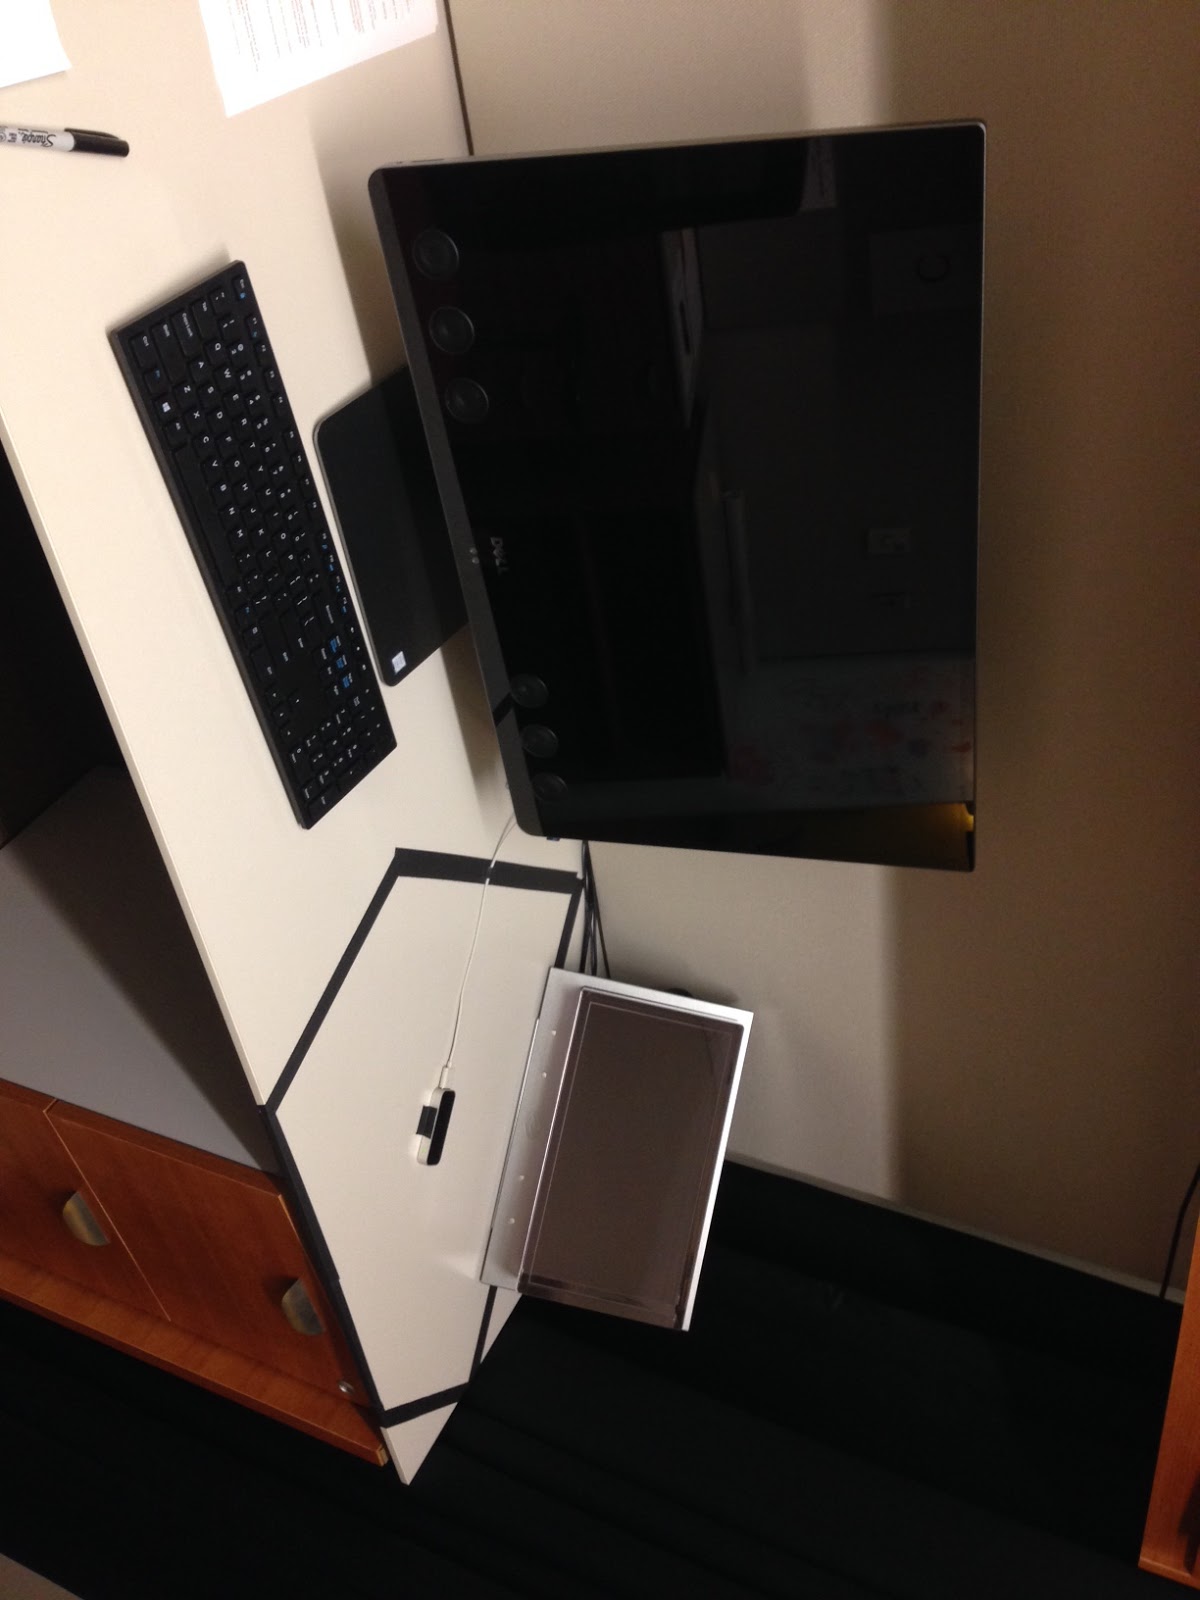
Virtual Brain setup, featuring touchscreen monitor and Looking Glass holographic display
Development
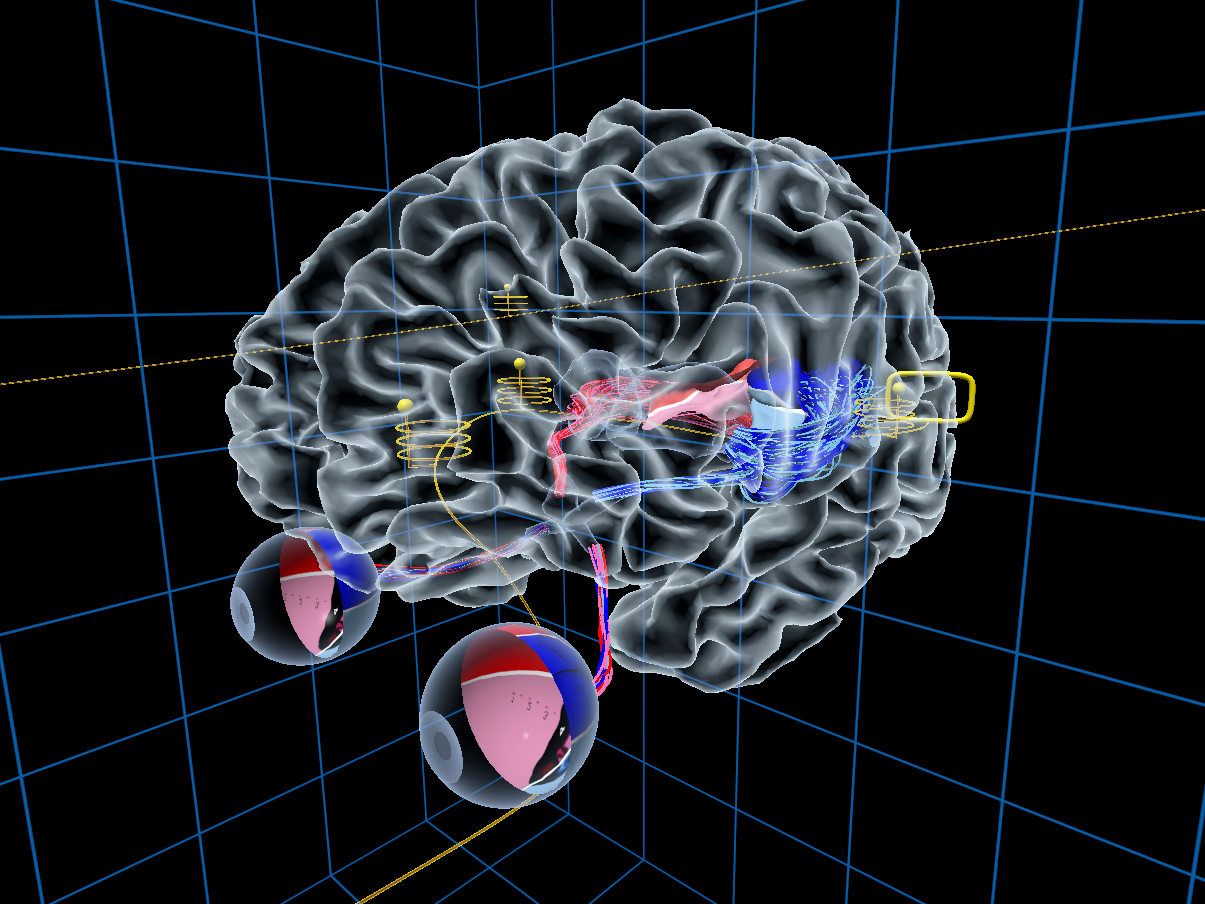
The Virtual Brain project is developed in Unity. Each lesson consists of a Unity scene including the necessary brain anatomy, interactive objects, and path layout. After the team writes the script for the lesson, work begins in Unity on laying out all the necessary pieces. A path is laid out for the user to follow, traveling through all the relevant brain regions for the lesson. Stations are placed along this path at various points. At each station, the user will stop and hear a voiceover explaining that region of the brain. At some stations, more complex visual effects can occur as well.
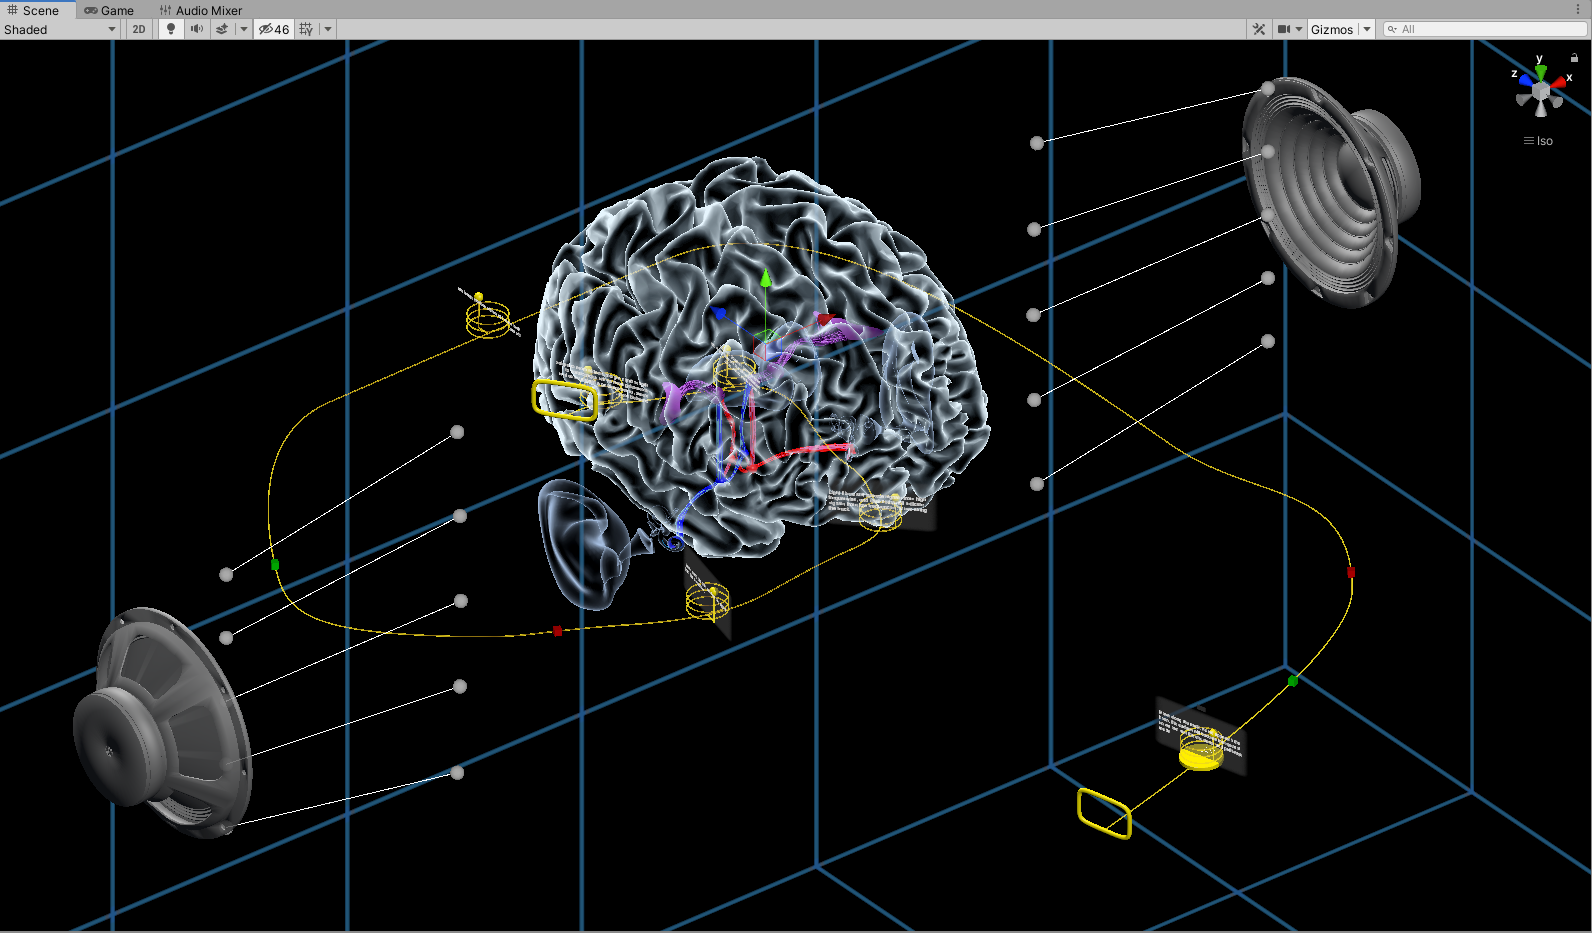
Overview of the Auditory System lesson
Each station uses a timeline system. This allows easy adjustment of the voice clips for each segment. Interactive effects, animations, and closed captions for each station are laid out on this same timeline.

Example of a timeline used for a single station
When complex effects are required, I have written several custom scripts to create them in Unity. Each script is written to be easily editable within the Unity editor itself. This allows members of the team to tweak the experience quickly and easily without having to dive into the code themselves. These scripts also allow for quick testing in the editor, without having to run through the whole lesson in a virtual reality headset.

Script example, used for the interactive waveforms in the Auditory System
Several custom scripts allow the creation of brain anatomy within the Unity engine. This allows team members with no 3D modeling experience to create accurate representations of various pieces of the brain for which no MRI data is available. As an example, most brain fibers within the project were created and colored via script.
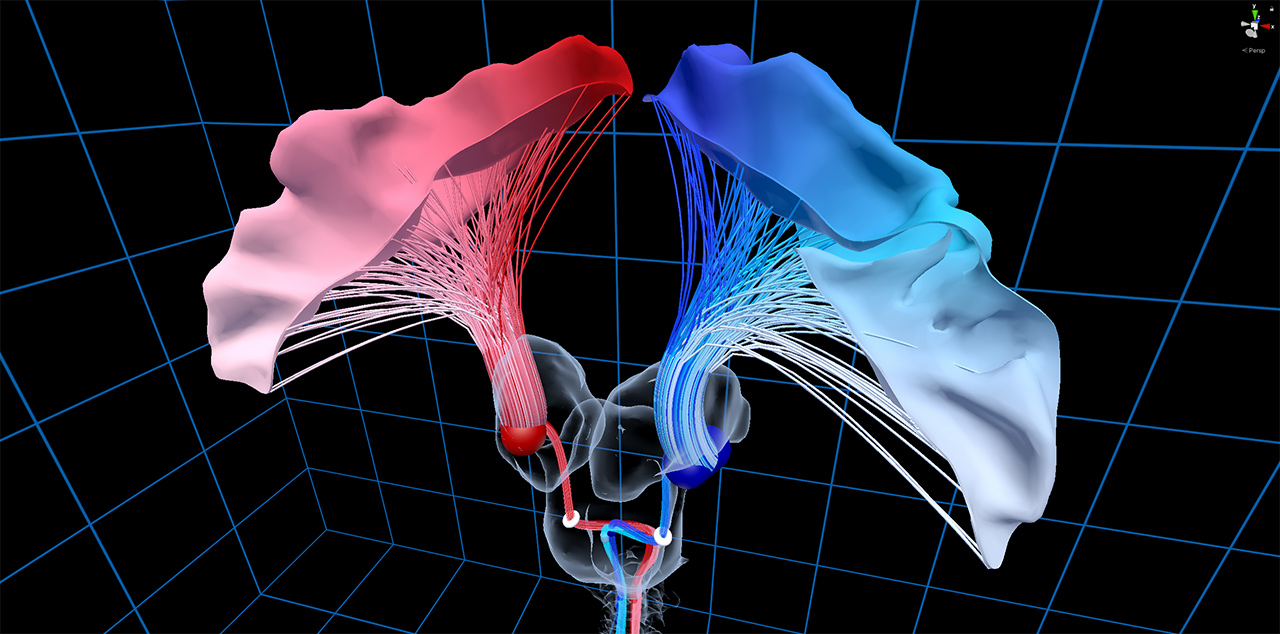
Custom model of brain fibers, connecting to MRI model of brain surface structures
Project Structure
The overall project is organized across several scenes. Each lesson is contained in its own scene. Additionally, there is a separate scene devoted to each supported platform. These scenes contain the camera and control schemes required to support that platform. The lesson and platform scenes can be loaded in any combination, meaning that the same lesson can be used with any display platform without requiring any editing of the lesson scene itself. Custom scripts have been written so that when scenes are loaded and unloaded, the correct connections are made between the necessary Unity objects.
There is also a master scene containing a main menu. This menu allows for the adjustment of settings and the loading of individual lessons. This allows all lessons to be contained in a single build.
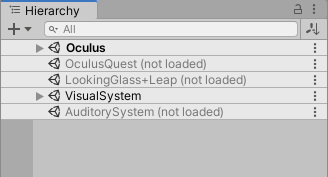
Example of some of the scenes used
The scenes within the Virtual Brain make heavy use of Unity’s Prefab system. The overall brain anatomy is contained in several nested prefabs. This allows the brain anatomy to remain consistent between scenes, while each individual scene contains only the specific brain structures it needs. Additonally, any edits made to the brain models or layout within the prefab will be propagated to the various scenes automatically.
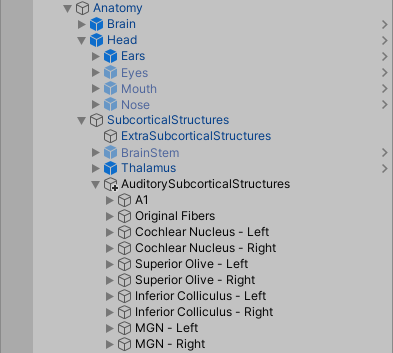
Example of scene structure
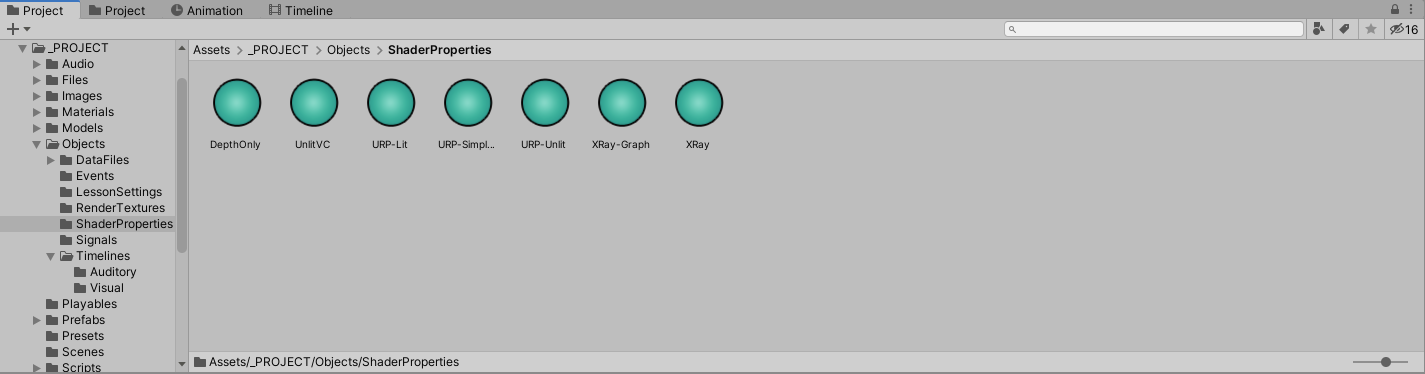
Unity’s Scriptable Object system is used for configuration files within the project. As an example, the settings for transitions between solid and transparent materials are contained within scriptable objects, one per shader, so the same settings can be used across many objects in the scene.
Version control support is achieved through use of the prefab, scene, and scriptable object systems. Since many parts of the project exist as their own prefab, scene, or asset files, merge conflicts are rare. Before implementing this structure, it was much more difficult to collaborate on this project across multiple team members.
The State, Command, and Observer patterns are used frequently across the project’s codebase. Script files are kept small and modular, which has kept the project easily maintained across various Unity versions. Additonally, much of the code in the project lives in a standalone Unity Package. This enables the code to be easily shared between multiple Unity projects. See the Unity Scripts page for more details.
Tools Used
Unity (various versions, from 2017.1 through 2020.2)
Blender 2.8
- Many of the 3D models used in the Virtual Brain project originated from MRI scan data. After converting this data into a 3D model format, further cleanup was performed in Blender. This included smoothing out artifacts in the model, texturing models to show color variation across their surface, and optimizing geometry for display on virtual reality devices.
- Several simple models, such as the yellow stations, were modeled in Blender from scratch.
- Some models, such as the brain fibers, were constructed via script in Unity. Based on a spline, fibers were generated with varying color, size, and shape.
Photoshop
- Photoshop was used for the creation of any 2D assets needed for the project, such as the UI and some textures.
Programming languages used: C#, Python
- C# was used for all Unity scripting in this project.
- Python was used to write scripts to assist in the research process. This included the script for running the Virtual Brain experiment itself, as well as scripts for organizing data from test subjects and automatically grading tests during the experiment.
Videos
Visual System demo (VR)
Auditory System demo (VR)
Somatosensory System full walkthrough (Desktop)